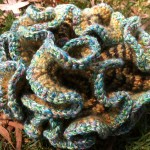
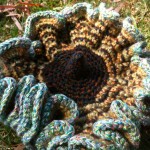
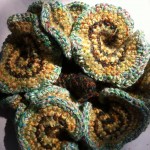
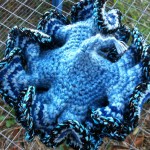
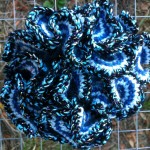
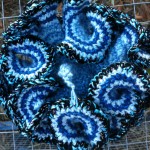
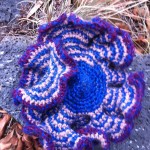
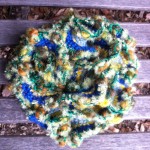
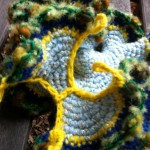
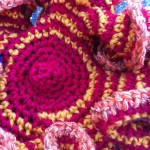
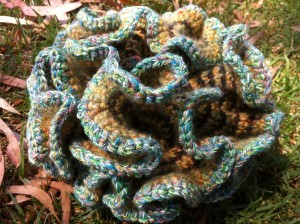
 A crochet model of a hyperbolic plane is simple to make, and fascinating to play with. With these models, learning about hyperbolic geometry becomes kinesthetically available.
Until recently, some mathematicians thought that hyperbolic geometry was purely theoretical and could not be effectively modeled in the real world. Here is one I finished recently.
Click the “Continue reading” link to learn why hyperbolic planes are cool, access some links, see how I made one, and enjoy a gallery of hyperbolic planes which I have crocheted.
Why Hyperbolic Planes are Cool
A plane in maths is two dimensional – it’s a surface. On a nice flat Euclidean plane, any two straight, parallel lines remain parallel forever.
In non-Euclidean geometry a plane does not have to be flat, but it is still considered to be two-dimensional. For example, the surface of a ball is a curved plane. While the ball itself is three dimensional, the plane of it’s surface is two-dimensional. Any point in a spherical plane can be described by just two variables (for example: latitude and longitude). The fact that the plane (or surface) can be fully described by two variables shows you that it is two-dimensional.
In maths, the spherical plane (surface of a ball) is an example of positive curvature. If a plane has positive curvature, then any two straight lines which are parallel at one point, will converge eventually. What does this mean? Think about the Earth – lines of longitude which are straight lines, and are parallel to each other at the equator, converge at the poles. (As a side note, the only line of latitude which is straight, is the equator. All the other lines of latitude are circles curving around the poles.)
A hyperbolic plane has negative curvature. Any two straight, parallel lines on a hyperbolic plane will diverge eventually.
It’s hard to get your brain around the concept of a curved plane containing a straight line, isn’t it? Even with lines of longitude as an example, it takes some work to generalize the concept. Then I ask you to believe that parallel lines in a hyperbolic plane curve away from each other. What exactly is that about? Don’t worry – this stuff is hard to grasp. Students of advanced mathematics struggle to conceptualize it too. Some mathematicians were so unsettled by hyperbolic geometry that they even spent their whole careers trying to prove once and for all that it can’t exist. This is where those lovely, woolly crocheted models of the hyperbolic plane are great for getting past your mental fixedness, and understanding how hyperbolic planes work.
In the natural world, hyperbolic planes exist in corals, sea slugs and the crinkly edges of fancy lettuce leaves. Many scientists think that the whole universe is actually hyperbolic. If you could measure how much universe there was (say) a million light years away, you would find there was more of it than you would expect. To my mind conceptualizing the structure of the universe qualifies as “pretty cool“.
Links and Context
About a decade ago, mathematicians started to understand that hyperbolic geometry (which was previously thought by many to be impossible to model) could be easily modeled using crochet. Here is a scholarly article in a mathematical journal which includes instructions on how to crochet.
Half a decade ago, science communicators started spreading the word, on creating and sharing these models which help us to understand hyperbolic geometry. This TED talk (20 minute video) The Beautiful Maths of Coral is worth every moment.
The Institute of Figuring was created to share hyperbolic crochet and similar communication tools for conveying maths and science concepts. Here are their Coral Reef Crochet Instructions
Crocheted coral reef galleries are now popping up all over the world, including this one in Melbourne’s outer eastern suburbs.
If you want to attempt a crochet hyperbolic plane model but have never tried crochet before, I recommend you start with this YouTube crochet tutorial for absolute beginners. This is the tutorial I used to teach myself crochet a few weeks ago. Her technique is clean, she’s nice and friendly, and the video is clear and well paced.
Finally, I get my yarns quite cheaply ($2 and $4 per 50g ball) from local supplier The Yarn Barn.
A Walk-through of one of my attempts to Crochet a Hyperbolic Plane
When crocheting a hyperbolic plane, I aim for beauty, simplicity and information.
Beauty is important to draw you in and tempt you to engage with the woolly model. I make my hyperbolic planes circular because I think they are prettier that way. I choose yarns that I find attractive and make the final row of crochet an interesting yarn which is evocative of the growing edge of a coral.
I use the most mathematically simple design, which is to keep increasing at a constant rate. The blue hyperbolic plane pictured in this post (below) was created by increasing one stitch after every three standard stitches, though any constant rate of increase gives you a mathematically valid result. Increasing after fewer stitches will make your model curlier, and increasing after more stitches makes it softer and more open. The hyperbolic plane I made by increasing after every second stitch became extremely curly and impractical to continue while it was still quite small.
I use the stitch which Americans call a “single crochet”, but you can just as easily use the “half-double”, the “double” or the “triple” crochet. Just keep going with the same stitch and maintain the rate of increase throughout.
For information, I like to use two contrasting yarns spiraling around the plane, which help orient you to the center and count the rows if you want to. I’ve also been adding some divergent-straight-parallel lines to the completed planes.
I quite like using fairly thick yarn (8 ply or more) and a 4mm or 5mm crochet hook. I’ll also start by choosing three balls of yarn, two fairly plain but contrasting tones to spiral through the body the the plane and a decorative yarn to finish the edge. One of the planes I make uses most of all three balls of yarn.
Begin by creating a loop of six chain stitches, then a row on single crochet. Then keep going around with your chosen rate of increase. I prefer “stitch-three, increase one” repeated forever. Depending on the weight of yarn, the middle may look like a small dome, or it might have a little hole in the middle.
 In this picture I’ve done a ring of chain-twenty, and from there the stalk is being back-filled. So, after the first row of single crochet, I start decreasing by continuing to spiral around using single crochet but skipping every fourth stitch.
 This picture is near the top of the stalk, where it’s getting difficult to winkle out the stitches. It’s OK to stop if it gets too fiddly. In mathematical terms, you could say that your model is truncated in the lower range. In my early models I “fudged” the center by sewing it closed with the end of the yarn. These days I prefer to leave a hole if I’m not going to finish the cone, as it’s more mathematically accurate (truncated, not fudged).
 Here we see the completed stalk. The final few rows feel very strange, as there are fewer stitches in the row than your decreasing rate. To be accurate, ignore the rows, and simply count stitches. Skip every fourth stitch, whichever row it ends up being in. When you are down to a single stitch, chain three more and then pull the yarn through the loop to close it off. This keeps true to the stitch-three-then-skip-one pattern.
 Now go to the base of the cone to start crocheting. Increase after every three single crochet stitches, and just keep repeating that pattern. This means that for three single crochet, your place the stitch into the next stitch of the previous row. Then when it comes to the fourth single crochet, you place it into the same stitch as the third single crochet. I usually find myself silently chanting something like “1, 2, 3a, 3b… 1, 2, 3a, 3b…”etc to keep track of where I am in the pattern.
It really is as simple as that. Even when you are dealing with the extremely curly outer rows with a thousand or so stitches in them, the pattern remains incredibly simple. You are in-the-moment, never needing to count past four to keep track of the pattern. It’s very relaxing.
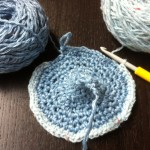 As the model flattens out into a witches hat, I like to introduce my contrasting colour. Spiraling two colors through the model is attractive and helps orient you to the center, but it is not mathematically necessary, but it doesn’t significantly mess up the maths either. You can start the dual spiral earlier but it’s fiddly to do so. I experimented with one hyperbolic plane that had three different colored yarns spiraling each other, but I found the worry over preventing three balls of yarn from tangling to be stressful, so I’ve settled on the dual spiral.
 In this picture I’ve done a row of the second colour, so I return to the first colour to do another row. The open loop that you are leaving will not unravel if you are careful. I make the open loop a bit larger and pull it tight in that position. If you are not confident to do this, you could use a safety pin to keep the other loop for you.
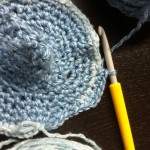 In this pic I’ve resumed the center color. There is a slight bump, but this won’t be noticeable as the model proceeds.
 For this particular model, I decided part way through that there wasn’t enough contrast between my two main colors, so I’m replacing the mid-blue with a deeper one. To do this I do one single crochet using both yarns together. The next and subsequent stitches use only the new yarn, and the old yarn is snipped a few inches from the work and the end is worked in using a yarn needle.
 Here we are continuing around with the new color.
The model is now large enough that you can see it starting to crinkle up.
When working with two contrasting coloured spirals, I find the visual transformation from one row to the next motivates me to race the two colours after each other. In this picture I’ve pinched the shape into a series of croissants.
 The dark blue row has gone as far as it can in this picture, and I’ve transferred my hook to the light blue ready to start it’s turn around.
For this picture, I’ve flattened out the shape as much as possible in the center, by tightly crinkling the edges. These last two pictures are “posed” differently to give you a feel for what the model is like at this size.
Bonus points if you noticed that I changed my crochet hook. I started this project with the 5.5mm hook, but for some reason I prefer the 4mm hook for this work.
 In this picture, I’ve done a couple of rows of the dark blue, and the folds are getting quite full. Time to think about the final decorative layer, and whether it will look better against the light or the dark blue – sample crochet of new colour at bottom of picture (click on thumbnail for a closer look). I decided it looked better against the light blue.
 Here’s what it looks like with a light blue outer edge.
 In this picture I’ve finished the dark blue, by pulling the end through the loop. It looks horribly messy at this point, but it will blend in just fine when you crochet over the top of it and sew the loose end in. I like to complete a “row” at the starting point where I started the first contrasting spiral. This probably isn’t necessary.
Next I continue the light blue until it connects up with itself and then swap yarns for the outer layer.
 Here I am swapping the light blue for the outer-layer blue by using the crochet-two-yarns-together-then-continue-with-the-new-yarn technique.
It doesn’t really matter how you change colour. Just do what seems to make sense.
 If I’ve judged it right, the final layer of my hyperbolic model takes up close to a whole ball of yarn. At this size, the model feels nicely complete, and I don’t have to buy a second ball of something obscure. In this picture, the final layer is almost complete.
 I’m including this picture because I was stunned to discover that on this model, I completed the final row with only 10cm of yarn to spare.
 Now we just have to sew in all those loose ends using a yarn needle.
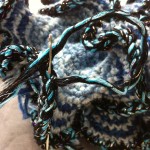 If you look closely here you can see the yarn needle.
Now it’s time to draw on a couple of straight-divergent-parallel-lines. These are a unique feature of the hyperbolic plane.
Start by finding a natural straight line on the plane, by folding it.
 Use a knitting needle to hold your fold in place while you work along the edge.
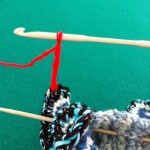 Attach a contrasting yarn to the outer edge using a couple of single crochet stitches, then chain fifteen and attach the next stitch back to the edge to make a loop. This loop is a handle to help people who are playing with the plane to find the straight line.
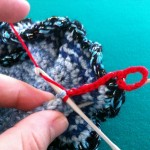 From there you just continue along your ridge-line, winkling up any stitch you can get your hook into, to create a straight line. This is quite nerve-wracking, and the result is usually better than you think it’s going to be. Using a yarn of the same weight as the rest of the plane usually works well. I used a thinner hook for this bit.
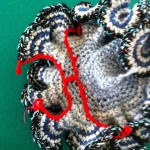 After your first line is secure, with a loop at each end, find a second straight line nearby and repeat the process, adding a cross-piece in the middle to make it obvious where the two lines are parallel.
In this one, I roughly measured to make sure that there was an equal amount of the perimeter between the ends of the first and second lines on both sides.
Gallery
Here are some models which I have completed so far. Three poses of each model are included. Click on the thumbnail for a larger image.


