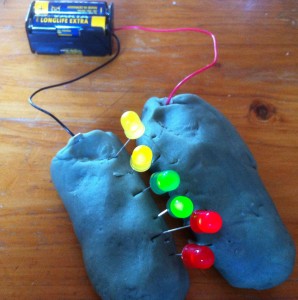
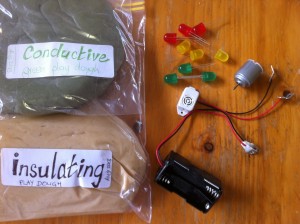
 Squishy Circuits is a home-made play-dough technology for introducing children to electronics. This simple parallel circuit contains four AA batteries in a case, connecter wires, six coloured LEDs and some conductive playdough. Everything you need to know about getting started, safety and recipes are on the Squishy Circuits website. Pictures of my kit and process are for enjoyment rather than instruction. What I do intend to add to the concept are some experimental questions to explore while you play with your squishy circuits.
My Kit
You can get a starter pack through the Squishy Circuits website, but it’s fairly easy to assemble your own. At the very least you will need a small battery pack (four AA batteries) with wires and some LEDs. I also got a small buzzer and motor. The playdough you make yourself.
Keep Calm
It’s important to be calm and persistent when dealing with electronics. My first squishy circuit failed. Had I put the LED in the wrong way? No – doesn’t work either way. What if I remove the dough? The buzzer worked without the dough – was that faint or full strength? Had I messed up the dough recipe somehow?? …In the end it turned out to be the batteries. I’d used rechargeables, and the two I’d taken straight off the charger weren’t ready yet.
Testing is an important part of electronics. When demonstrating a new concept, it helps to test all of your components before starting. The testing method itself is also something worth teaching. A methodical problem solving approach is your most valuable tool, whether you are trying to identify a faulty component or trying out a new circuit design.
Core Concepts
To get a child started, demonstrate these basic electronics concepts using your squishy circuit.
- a circuit is a loop containing a power supply (battery pack), a widget of some sort (the load) and wires (including the conductive playdough).
- if the loop is cut, it doesn’t work any more (that’s how a switch works).
- if the wire/playdough makes a loop to the battery without needing to go through the widget, that is called a “short circuit” meaning your widget doesn’t work and the battery will go flat too quickly.
- many widgets have a direction, like the LEDs which only work one way around.
- our special playdough is a good conductor of electricity, but not perfect.
Questions to Explore
I found that my LEDs glowed with different amounts of brightness under slightly different conditions. So without having any special electronics measuring tools, I can see what works better or worse just from how bright my LEDs are. Here are some questions to explore.
What works better to conduct electricity, and make the LED bright:
– fat sausages of playdough or thin straws?
– short or long pieces of playdough?
– a flat plate of playdough, round sausage or another shape?
– a row of playdough balls bridged by a series of LEDs or those same LEDs between the same two lumps of playdough? (series vs parallel circuits)
How sure are you of your answers?
Did you look at the two circuits you were comparing at the same time, or did you need to re-use parts and “remember” how bright the previous circuit made the LEDs?
If you have created two circuits to view side by side, are your power supplies equivalent, or are some of the batteries flatter than others? Are there any useful tests you can do to tell?
If you created two different circuits running simultaneously off the same power supply, how much of the difference in brightness is due to the different amount, thickness or length of playdough you have used? What tests can you do to understand this?
How does the insulation dough affect your circuits?
How does a sausage of conductive dough compare to a sausage of the same width with a core of insulative dough and only a layer of conductive dough on the outside?

